Creator Assertions (CAWG) Certificate Guide
How to get a verified CAWG identity certificate and add it to Proofmode, so the media you capture carries your own cryptographic signature.
What is a CAWG certificate?
A CAWG (Creator Assertions Working Group) certificate is a digitally signed cryptographic “public key” that lets an individual or organization add their own verifiable identity signature to media and documents. CAWG is used with the C2PA standard, also known as Content Credentials, to provide metadata (“assertions”) about identity, AI usage controls, and other information about the creator. The two standards, and their certificates and signatures, do different jobs:
C2PA certificate
Signs the media manifest and protects it from tampering.
CAWG certificate
Identifies who is asserting the content's provenance.
The latest releases of Proofmode for Android and iOS, built on the free and open-source C2PA Mobile SDKs, let you add CAWG claims and signatures. This gives you cryptographically verifiable authorship of the media you capture with Proofmode.
Why do I need a CAWG certificate?
Here are some real-world situations where tying a cryptographically verifiable identity to a photo or video captured in an app like Proofmode is useful, or even necessary:
Wants to cryptographically assert that a digital photo was captured by them, and that they own the original copyright, before sending it to an agency.
Records an audition scene to send to a casting director. Nervous about how it might be used in the future, they want to embed a "No AI allowed" flag in the video file.
A government program requires signed visual evidence that subsidized food was delivered to a school by verified staff. CAWG certificates on each device tie photos to verified employees and to the organization.
All of these are actual use cases from people using Proofmode today, and each one needs CAWG capabilities and a properly verified, signed certificate.
Where can I get a CAWG certificate?
Several providers issue CAWG X.509 certificates for a fee. This guide covers SSL.com, where CAWG Individual Validation (IV) certificates cost about USD $50 at the time of writing.
Buy the certificate
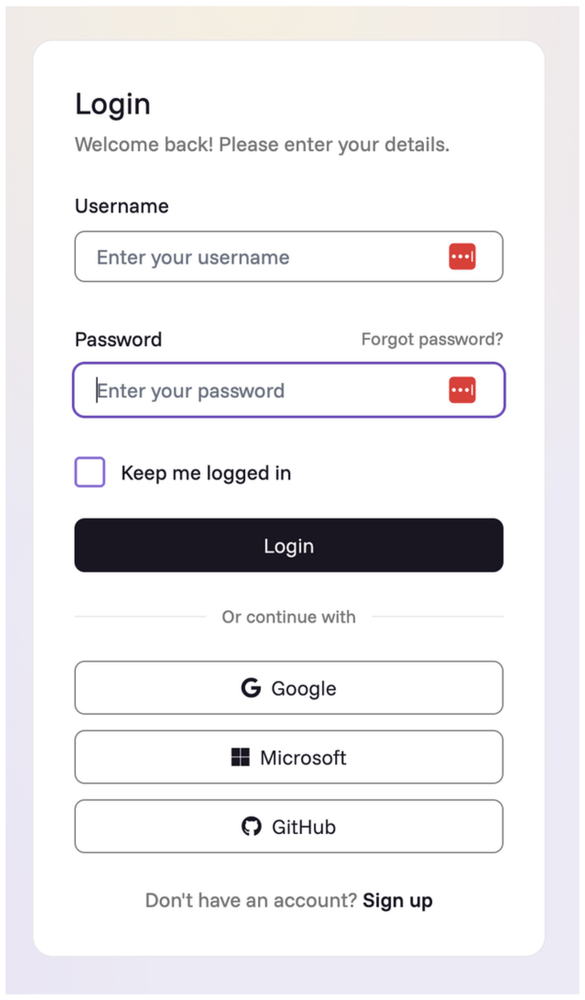
- Create an account on SSL.com. You can also sign up with Google, Microsoft, or GitHub. Whichever you choose, the account email must match the email you want on your certificate.
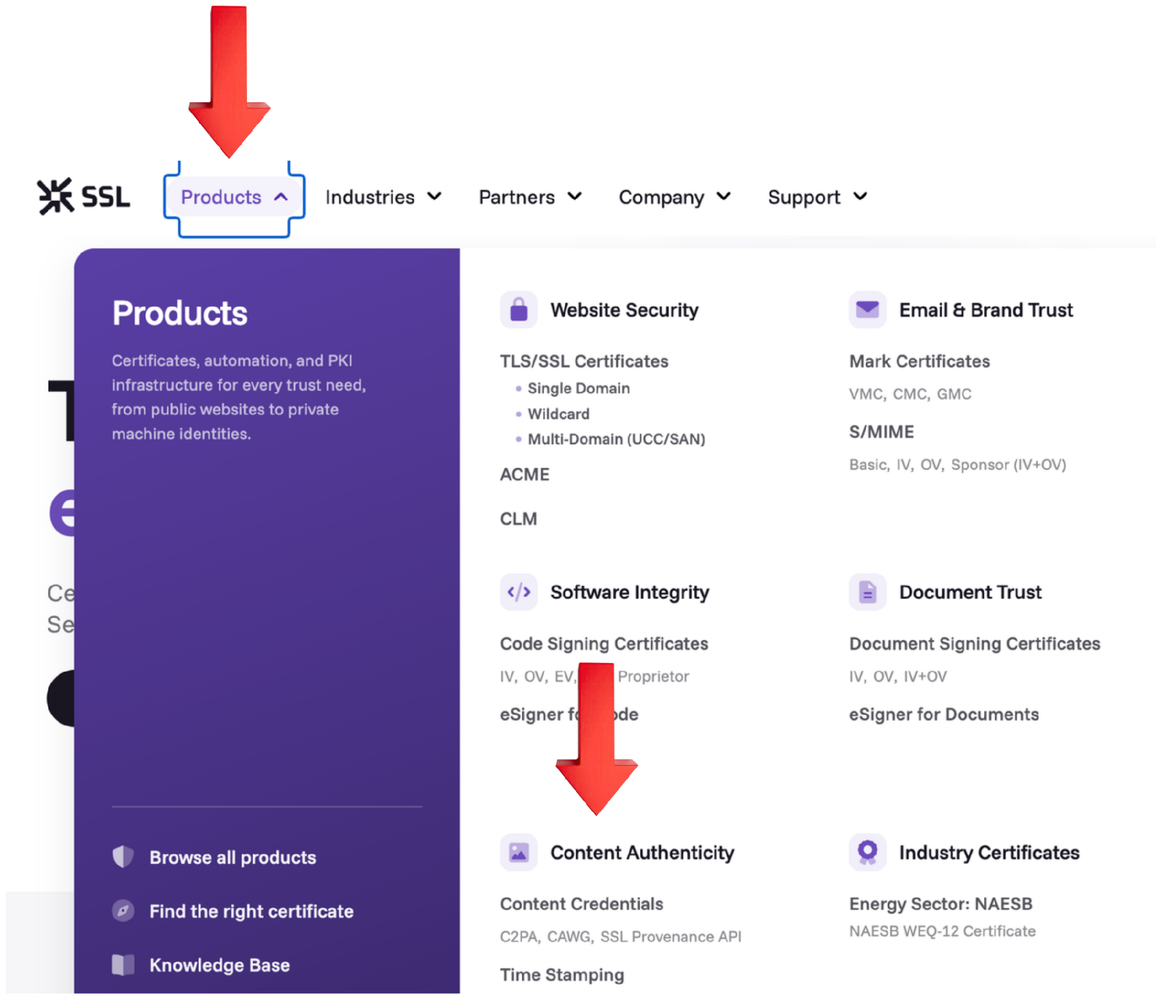
- Go to Products → Content Authenticity (Content Credentials).
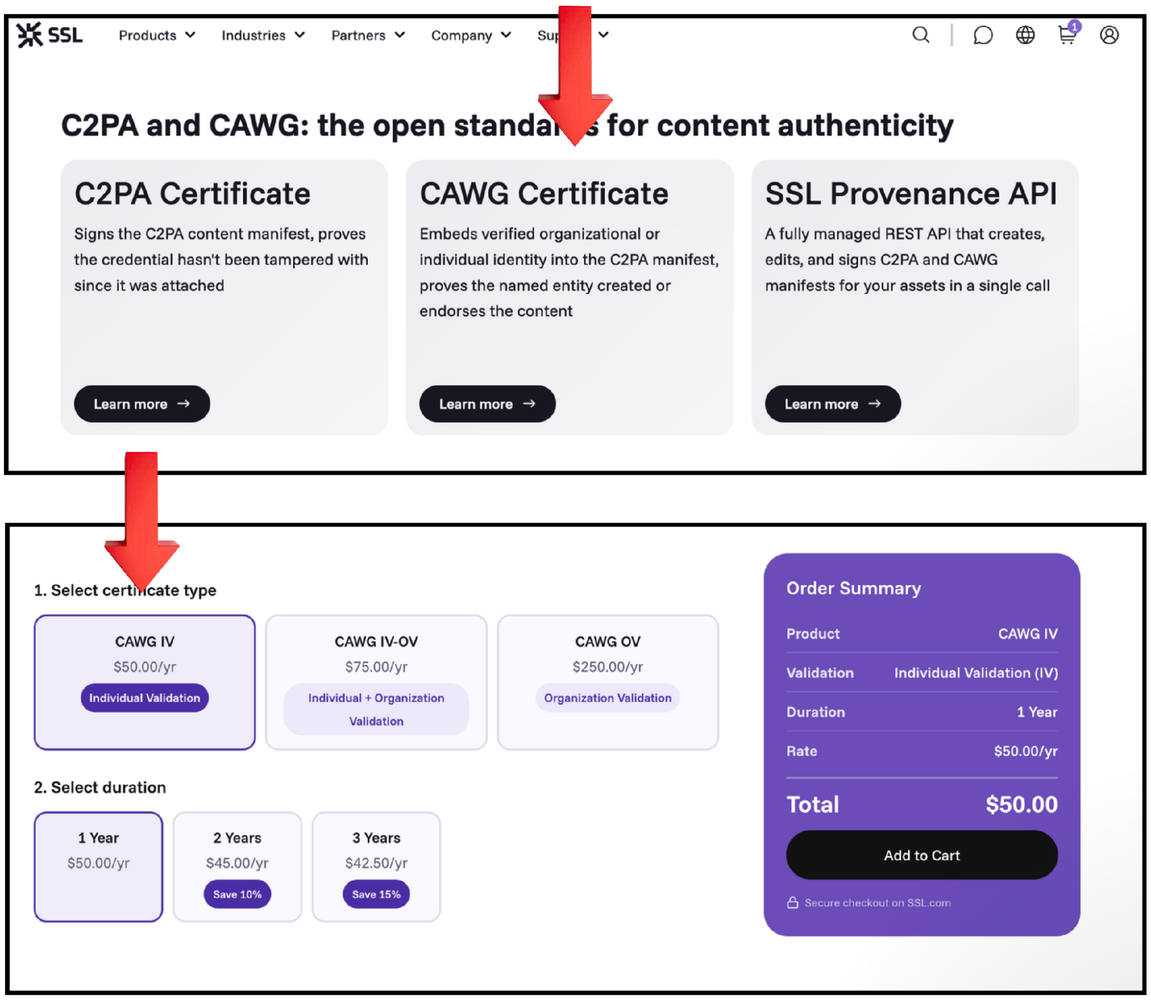
- Under CAWG Certificate, select CAWG IV (Identity Verification) and make the purchase.
- Write down your order number. You might need it for support later.
Complete identity verification
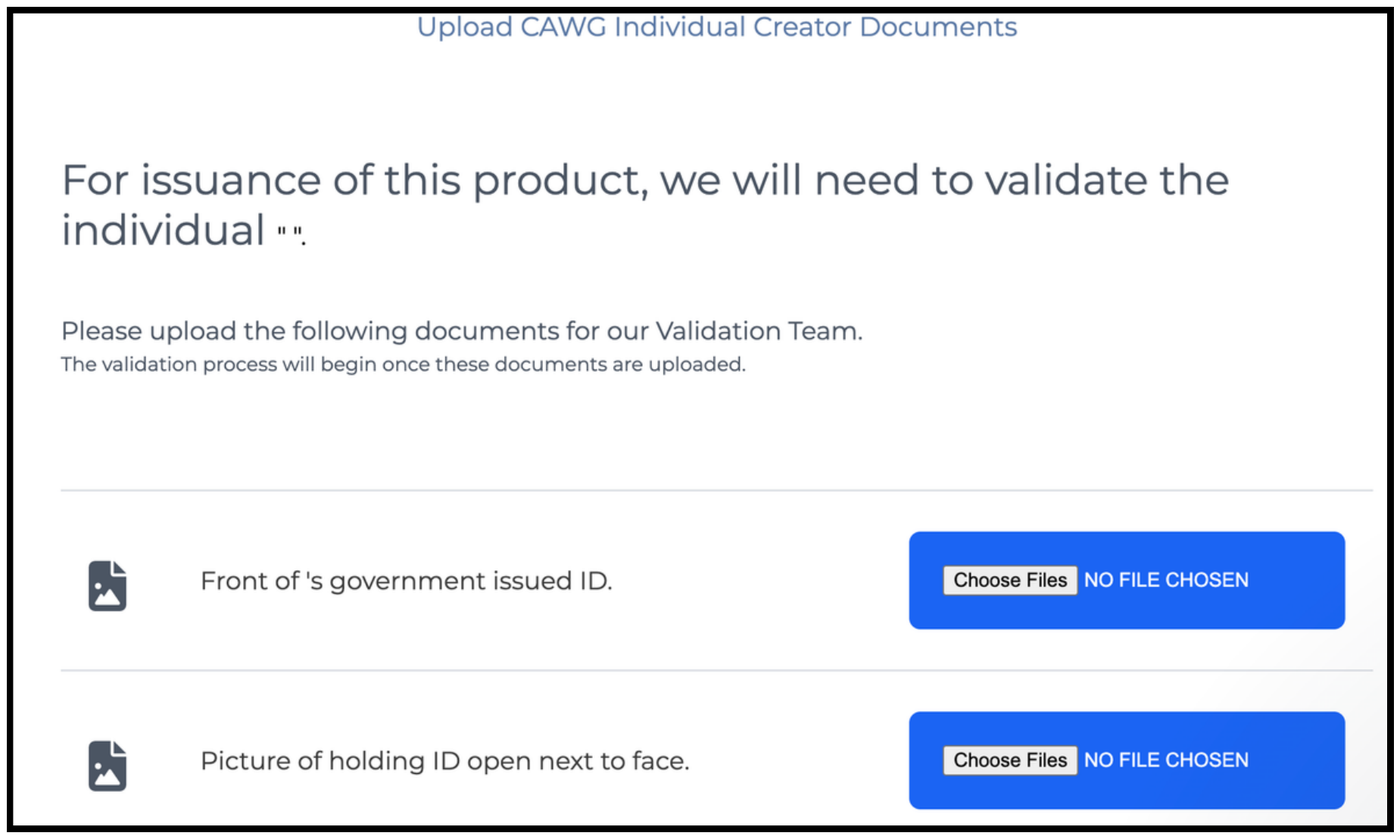
After you order the certificate, SSL.com will email you a link to the identity verification page. Identity verification confirms that your government-issued name matches the name that will be embedded in the certificate they issue. To do this, you provide images of your ID and your face.
You will be asked to upload:
- A photo of the front of your ID
- A photo of the back of your ID
- A photo of you holding the ID next to your face
- (Optional, but strongly recommended) A short video of your face turning slowly left to right, then up and down
- Upload the video along with the photos on your first try. If you skip it, the system may ask for it later, which adds a delay.
- Use even, bright lighting without glare on the ID, and avoid shadows on your face.
- Make sure all text on the ID is sharp and readable, and nothing is cropped out.
- Keep your face and the ID both fully in frame and in focus.
If verification fails
Even clear submissions are sometimes rejected by the automated check. If this happens:
- Resubmit. You will get an email asking for new images. Some emails explain why the submission was rejected and some don’t. Retake the photos and video, paying close attention to lighting and focus.
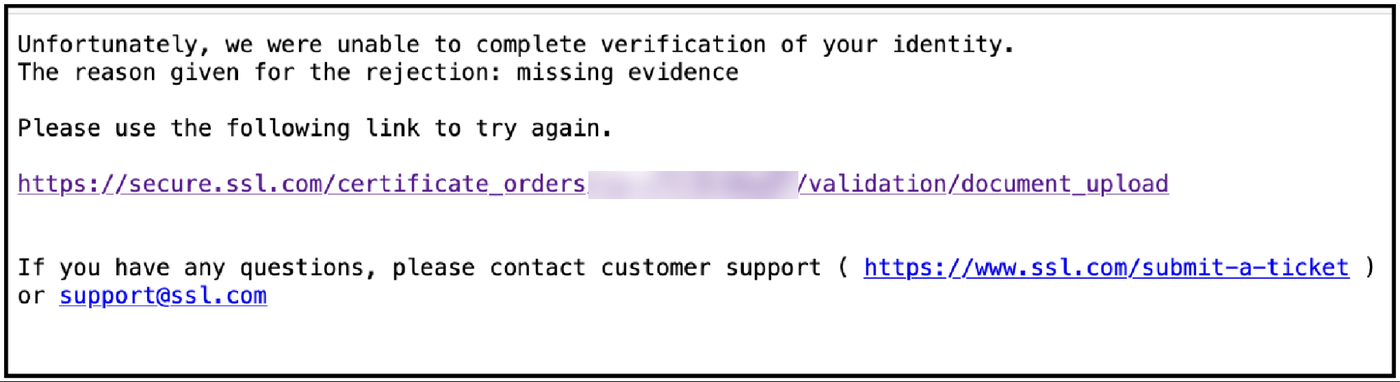
- Contact support if the resubmission also fails. Email support@ssl.com and include your order number to open a ticket. You can also use the live chat on their website.
- Ask for a live verification call. First-line support is partly automated. If you get general replies that don’t fix the problem, ask for a phone or video call with a member of the verification team.
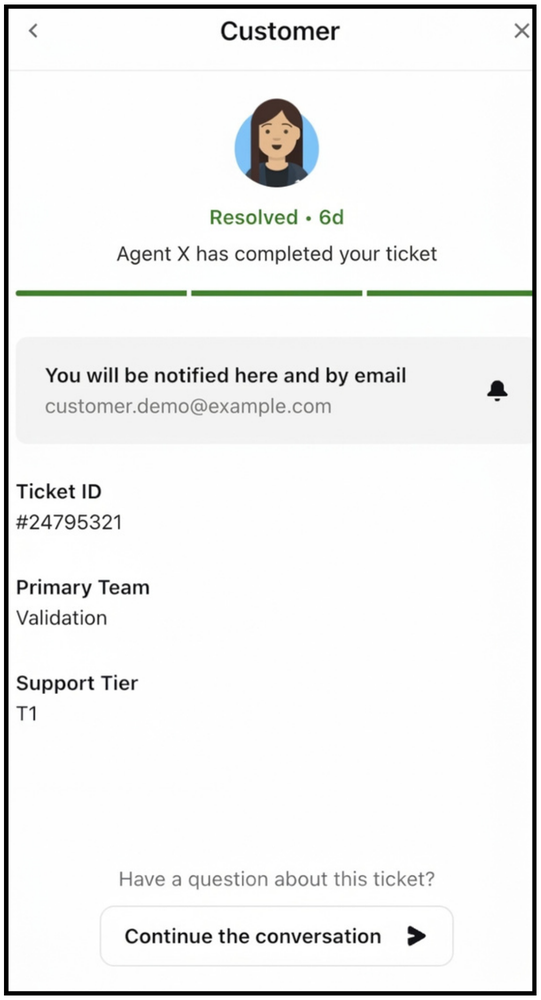
Live verification call
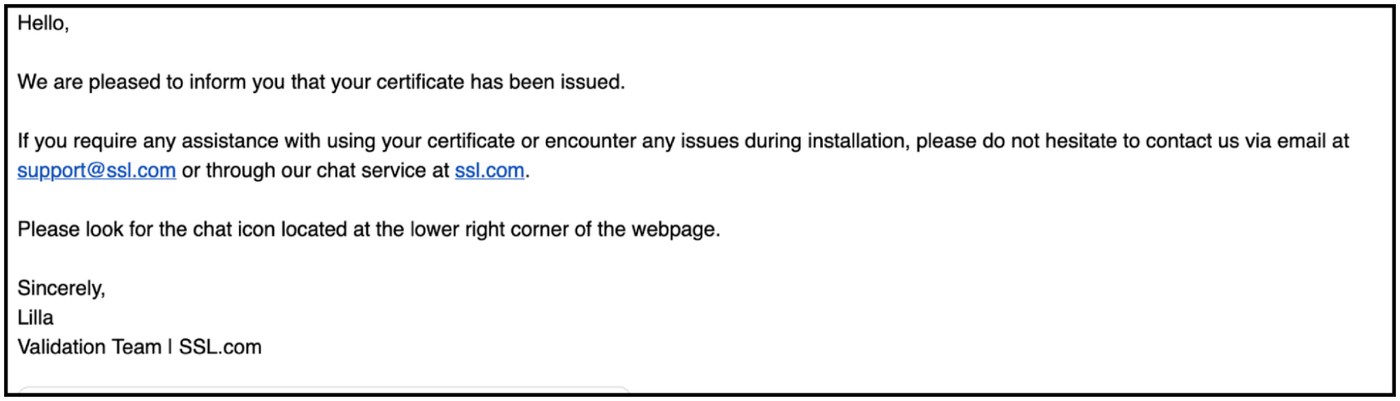
On the video call, a representative checks your face and ID in real time (you need to agree to the call being recorded). After the call, verification is usually done within a few hours, and your CAWG certificate is issued.
Add your certificate to Proofmode
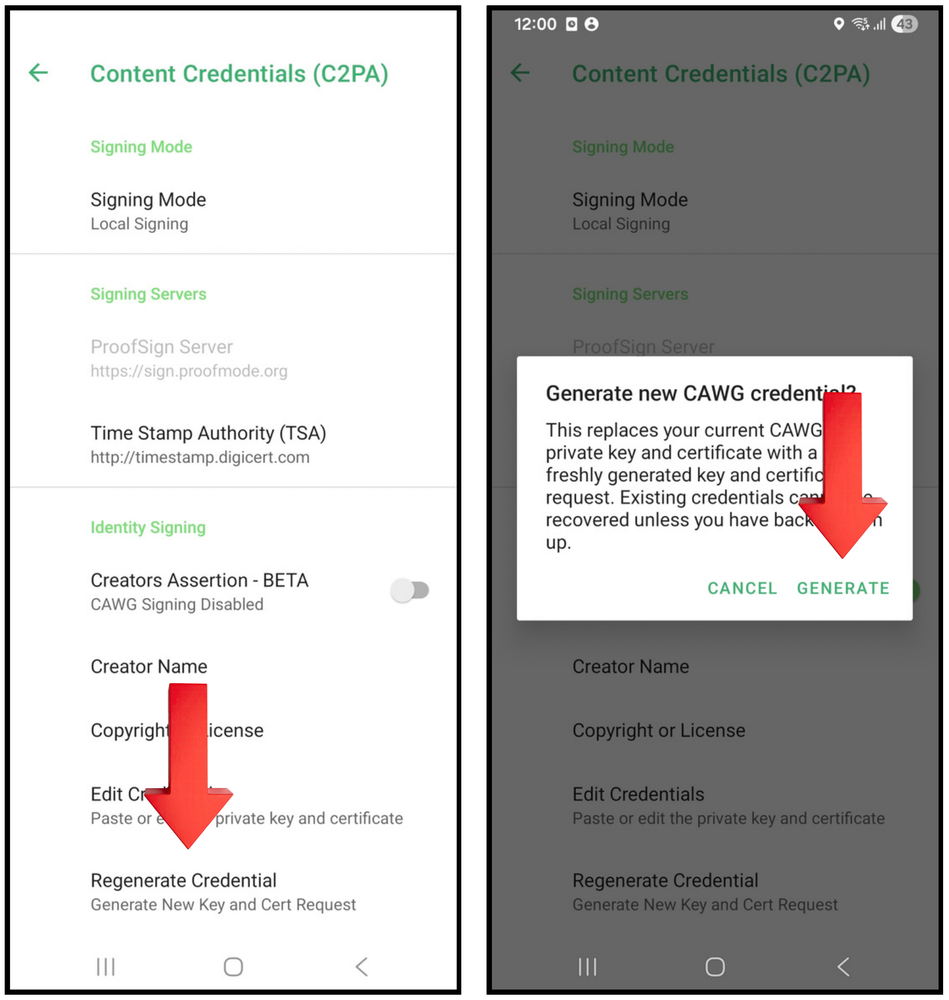
- Open the Proofmode app and tap Settings in the top-right corner of the screen.
- Go to Credentials.
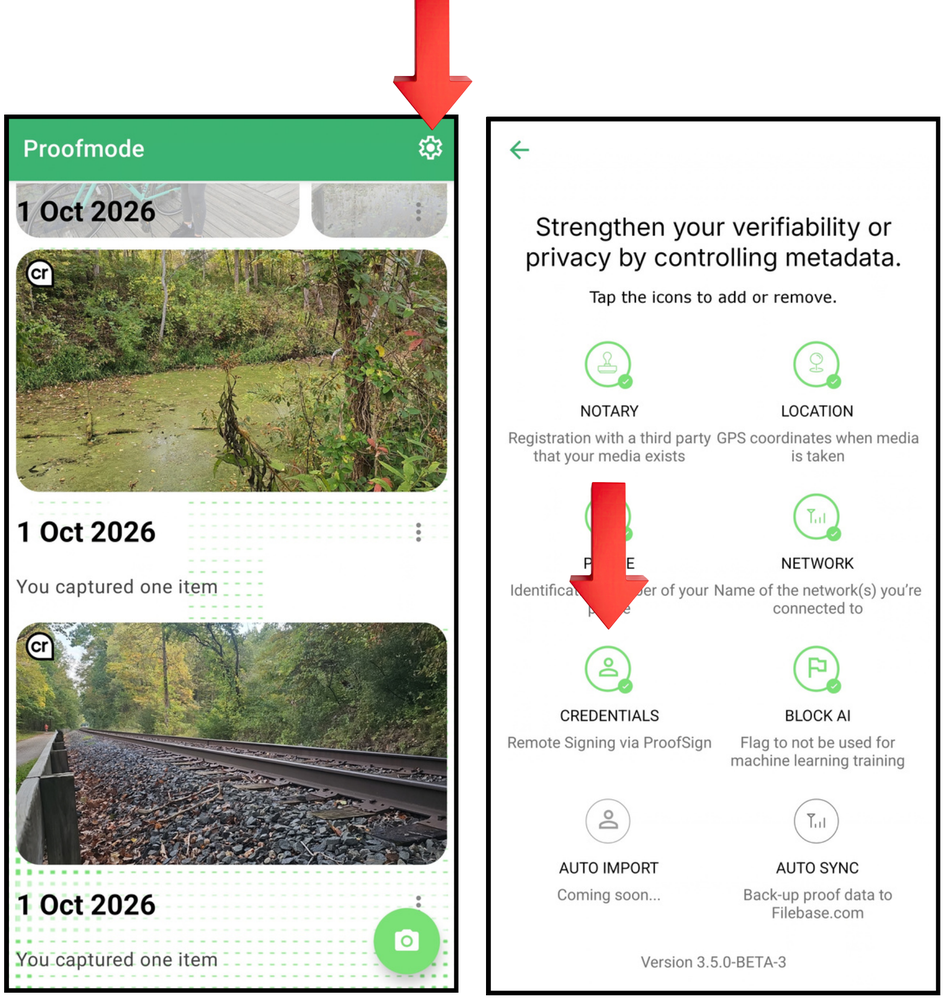
- Tap Regenerate Credential.
- Choose Generate. This creates a private key stored only on your device, and a public key that you will share with SSL.com as part of the Certificate Signing Request (CSR).
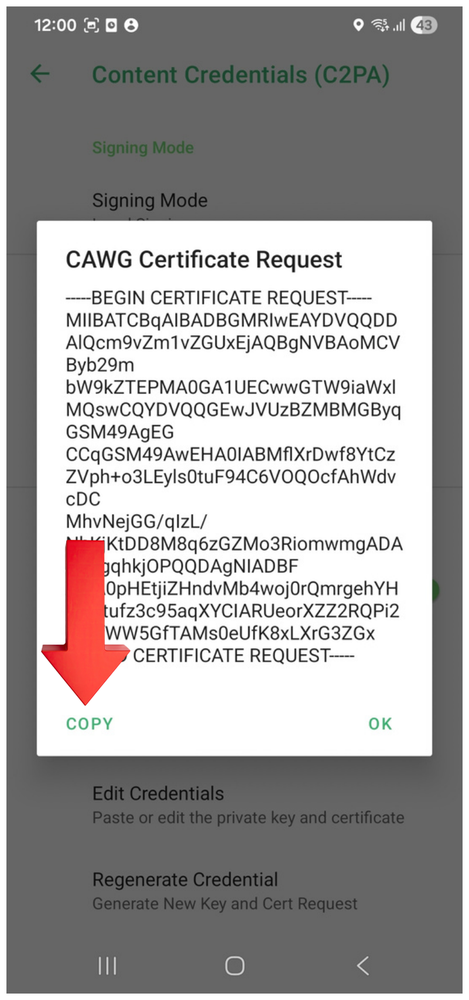
- Copy the CAWG Certificate Request.
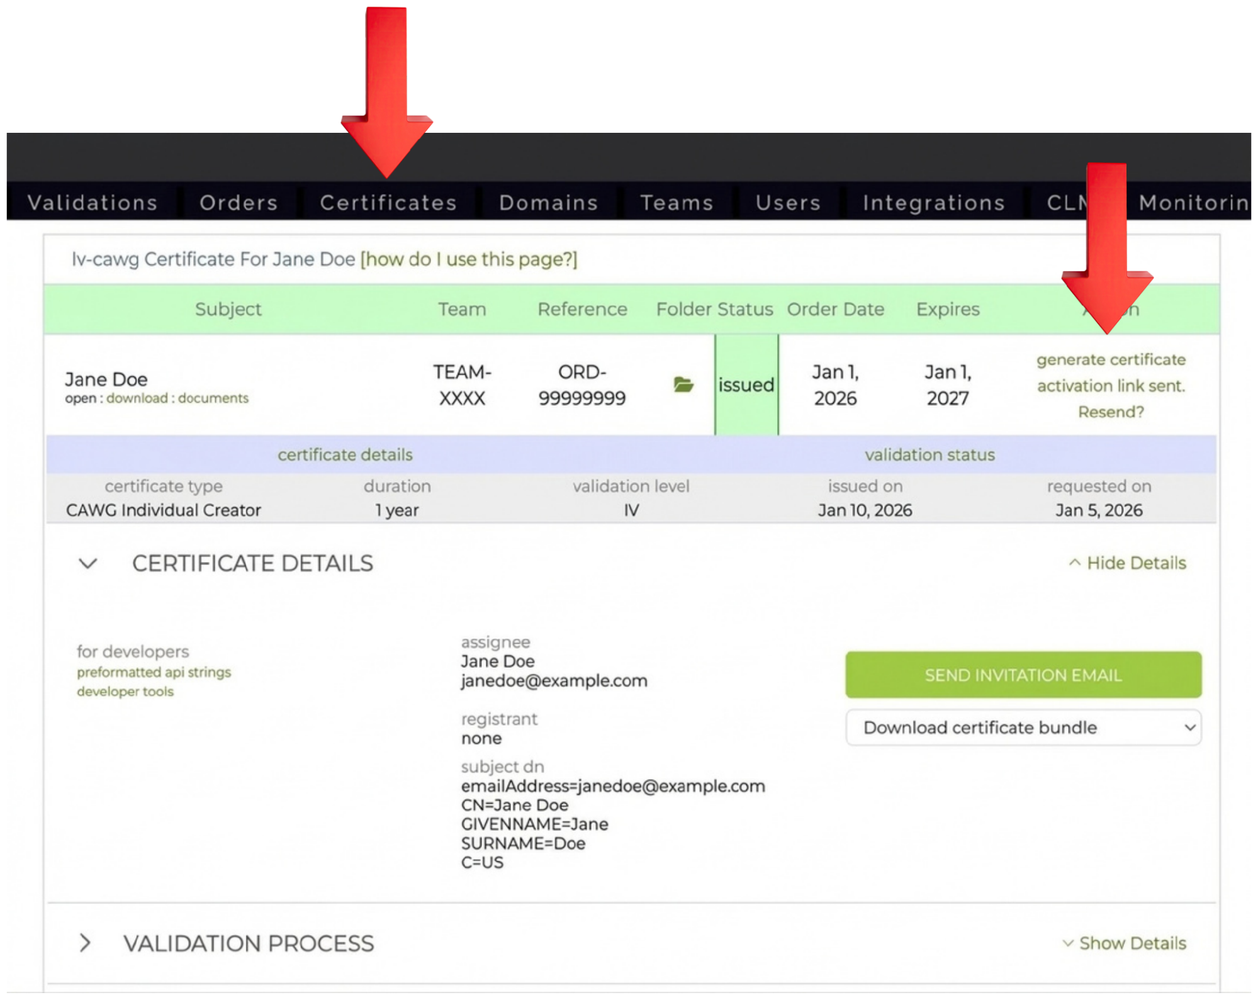
- Sign in to your SSL.com account.
- Go to Certificates.
- Click Generate Certificate.
- Paste your CAWG Certificate Request into the CSR field.
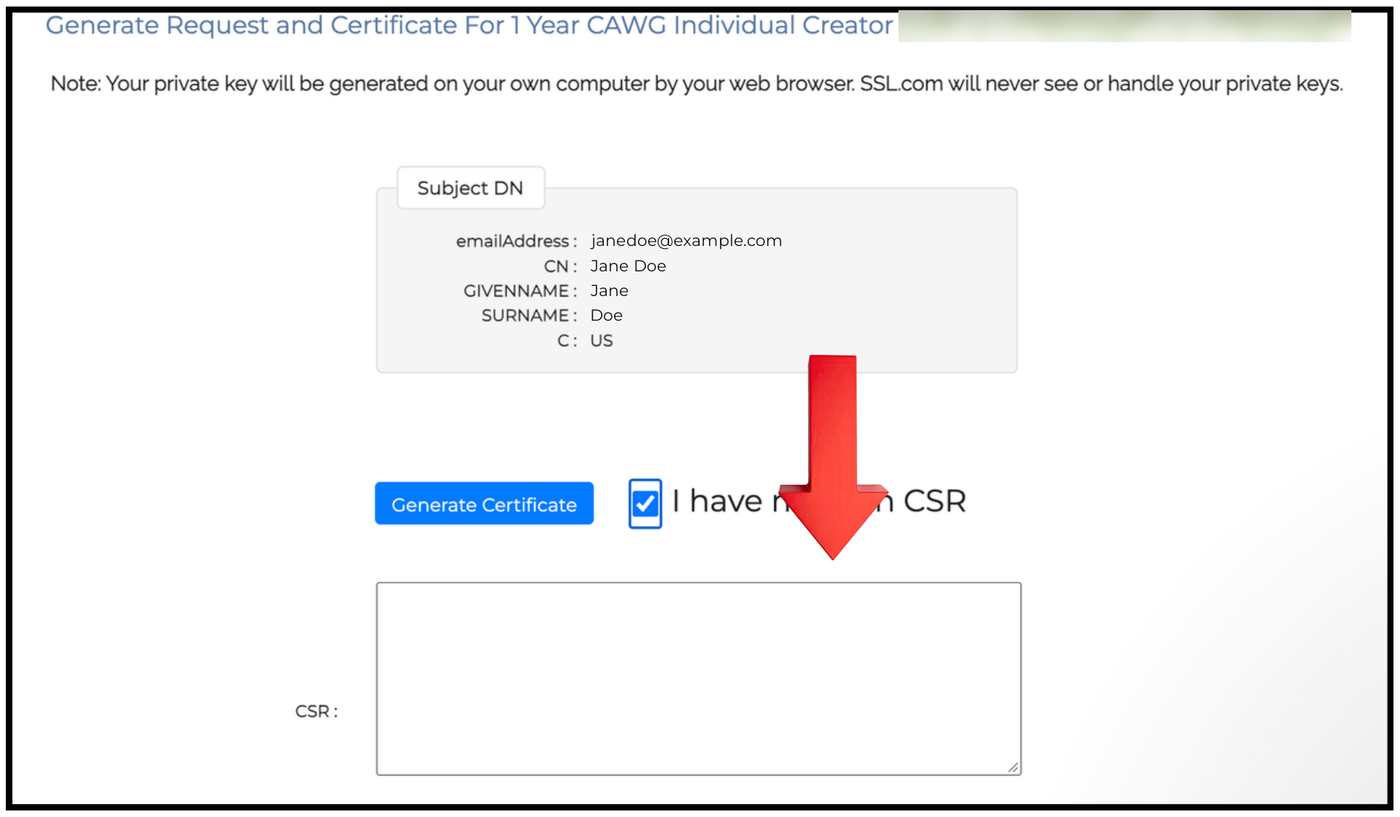
- Click Generate Certificate.
- You should receive an email confirming that your certificate has been issued.
- Copy your issued certificate from the Certificates tab.
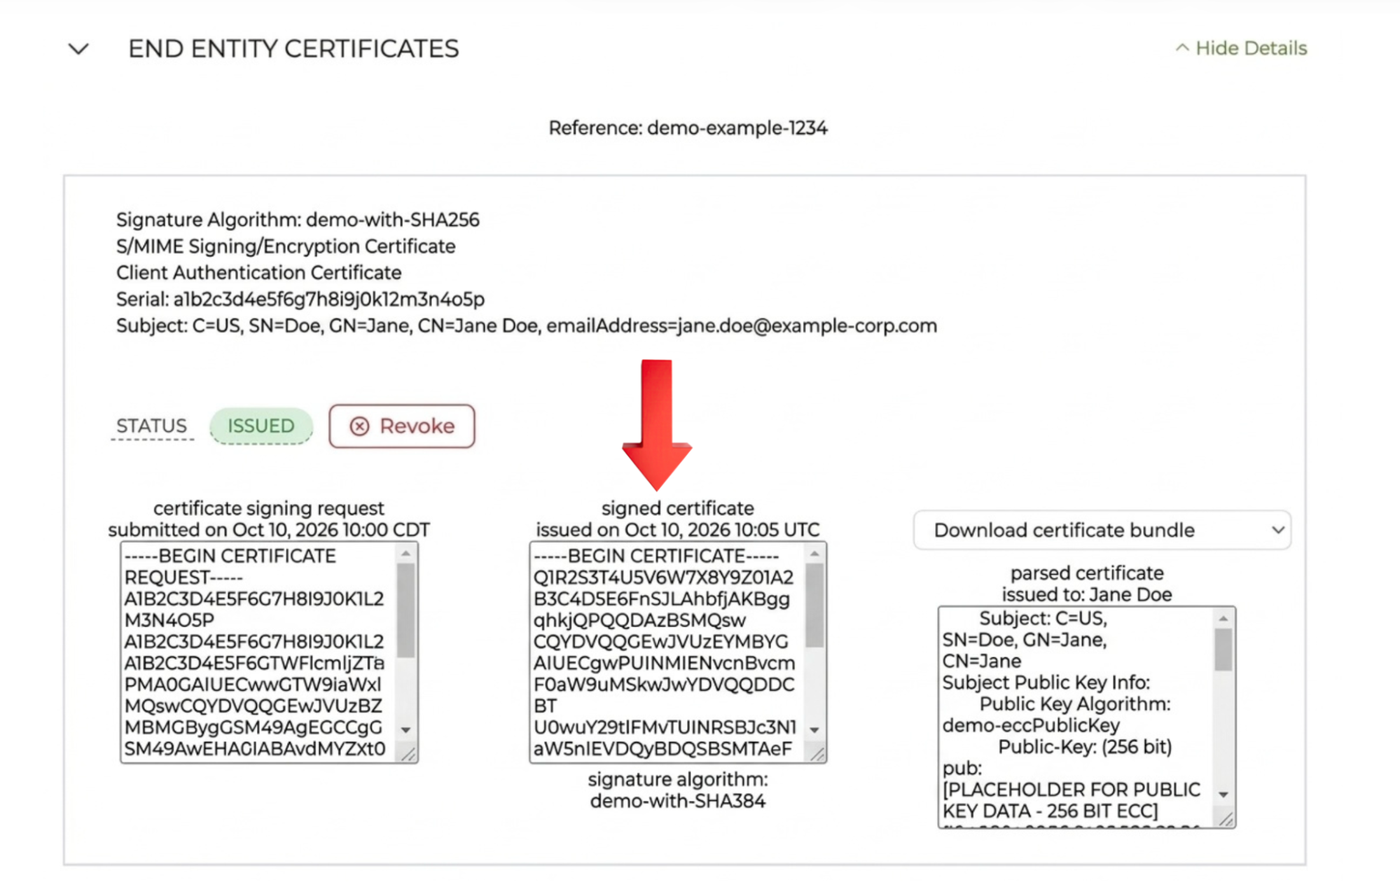
- Paste it into the Edit Credentials section of the Proofmode app, and tap Save.
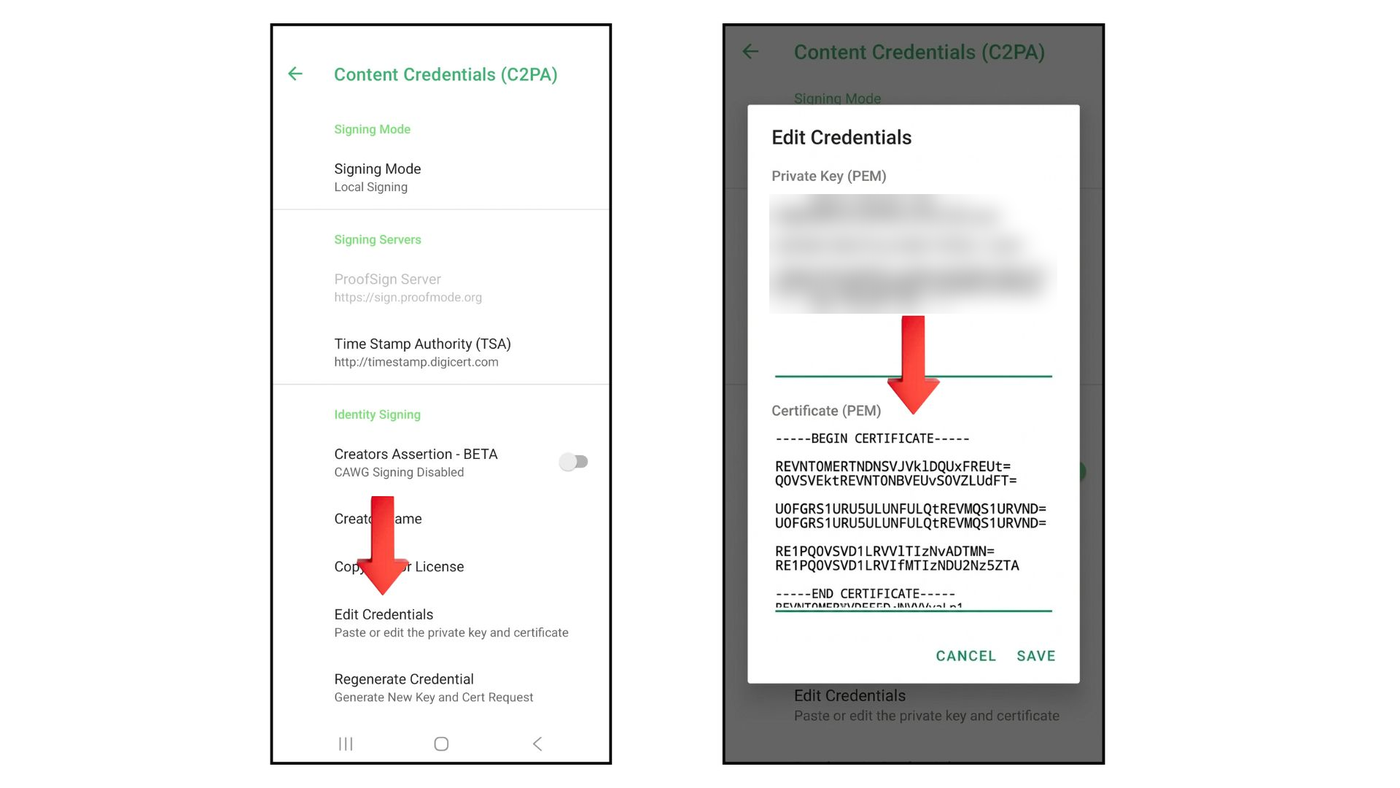
You are ready to start signing the media you capture with Proofmode using your own Creator Assertions (CAWG) signature.